打开后台程序
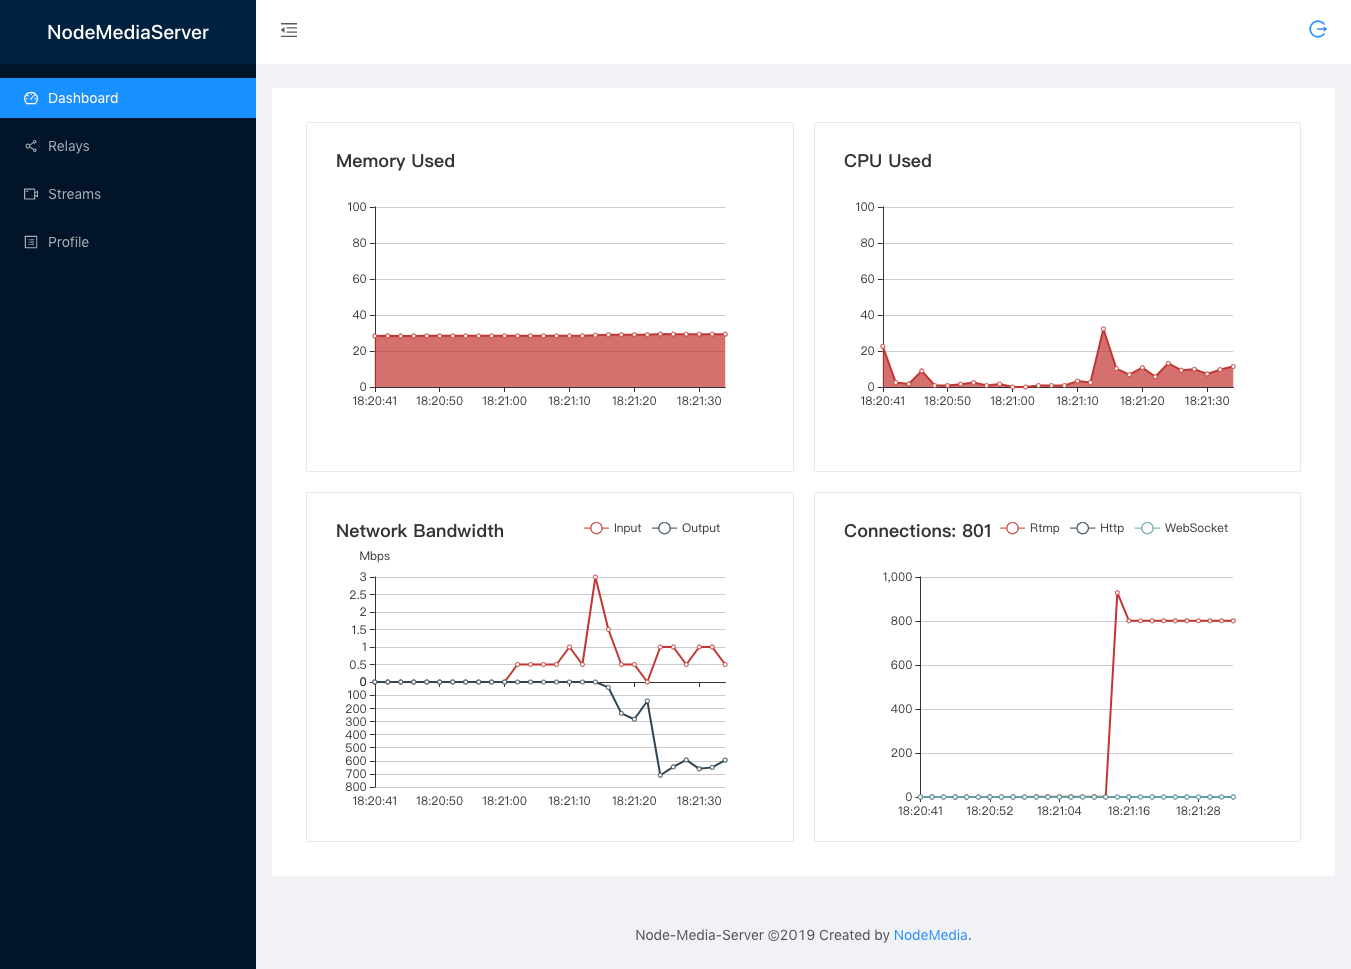
程序运行后,可通过浏览器访问 http://server_ip:8000/ 访问nms管理后台
登陆
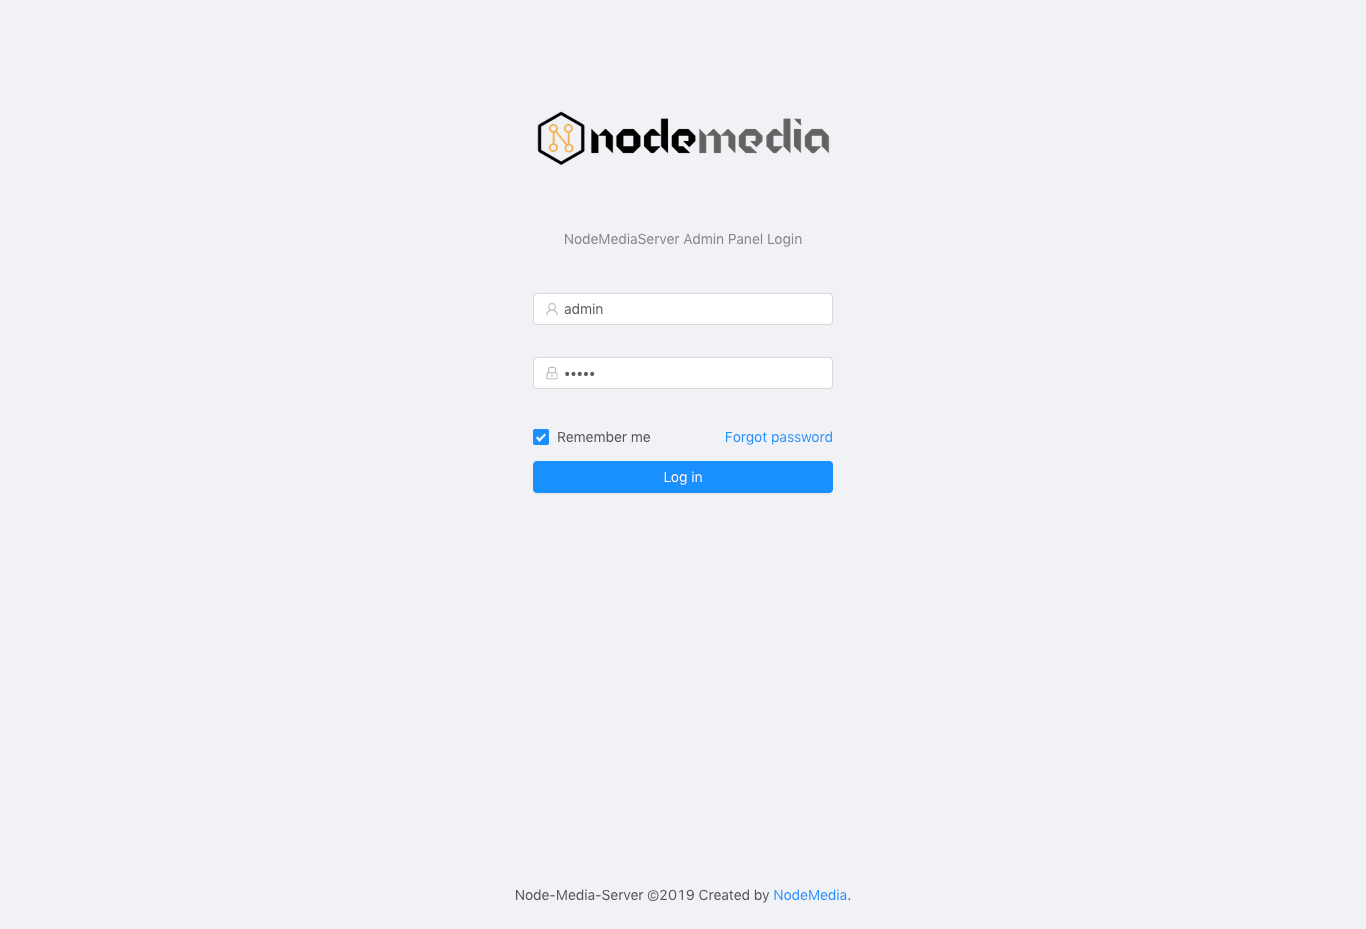
当配置文件项 auth_api 开启并且正确设置了auth_api_user和auth_api_pass,第一次打开管理后台页面时,需要进行登陆。

程序运行后,可通过浏览器访问 http://server_ip:8000/ 访问nms管理后台
当配置文件项 auth_api 开启并且正确设置了auth_api_user和auth_api_pass,第一次打开管理后台页面时,需要进行登陆。
nms直接运行后,可以看到控制台输出打印
2019/12/05 21:54:55 [I] NMS Version:3.1.12
2019/12/05 21:54:55 [I] Copyright:©2019 NodeMedia.
2019/12/05 21:54:55 [I] Website:www.nodemedia.cn
2019/12/05 21:54:55 [I] Author:Chen Mingliang [illuspas@msn.com]
2019/12/05 21:54:55 [I] Build Time:2019.12.03.163435
2019/12/05 21:54:55 [I] Commit Hash:311fd18bf4c1896b94260f4cad290e064951208d
2019/12/05 21:54:55 [D] RLIMIT_NOFILE 10240
2019/12/05 21:54:55 [I] Machine ID:[587dcbb5885f3ca14e87fde14e01c36da31eff15bf37f86df2c0402f0e06be27]
2019/12/05 21:54:55 [I] Free trial, exprition date:2020-06-01
2019/12/05 21:54:55 [I] Node Rtmp Server start on port 1935
2019/12/05 21:54:55 [I] Node Http Server start on port 8000
2019/12/05 21:54:55 [I] Node Https Server start on port 8443
可以看到 rtmp服务绑定1935端口,http和https端口分别是8000和8443
1935作为rtmp的默认端口,可以在使用时不填写,比如
# ffmpeg 推流
ffmpeg -re -i INPUT.mp4 -c copy -f flv rtmp://server_ip/live/stream
# ffplay 播放
ffplay tmp://server_ip/live/stream
8000端口作为http-flv和websocket-flv端口,需要跟上端口号和.flv后缀
# ffplay 播放
ffplay http://server_ip:8000/live/stream.flv
# html5 websocket播放
ws://server_ip:8000/live/stream.flv
API接口和管理后台复用8000和8443端口,浏览器直接访问web后台
http://server_ip:8000/
https://nodemedia.oss-cn-hangzhou.aliyuncs.com/nms/3.1.15/nms-windows-amd64-20191211.zip
https://nodemedia.oss-cn-hangzhou.aliyuncs.com/nms/3.1.15/nms-linux-amd64-20191211.tar.gz
https://nodemedia.oss-cn-hangzhou.aliyuncs.com/nms/3.1.15/nms-linux-arm64-20191211.tar.gz
https://nodemedia.oss-cn-hangzhou.aliyuncs.com/nms/3.1.15/nms-darwin-amd64-20191211.tar.gz
docker run -it —name nms -p 1935:1935 -p 8000:8000 -p 8443:8443 illuspas/nms
Node Media Server 以下简称nms,最初是以node.js实现的RTMP协议流媒体服务端。
最新v3版使用go语言重写了整个项目,获得了更好的并发性能,也拥有了更强的功能。
上一篇《用Go语言开发的新版NodeMediaServer》说到使用了CGO实现的内置音频实时转码器。开发中遇到一个很严重的问题:无法直接生成跨平台可执行程序了。
首选我们了解到,Go语言是可以在开发平台直接生成多个目标架构和系统的可执行程序。只需要在编译前指定GOOS和GOARCH,便可以直接生成目标文件。
但当使用了CGO,便失去了这种能力。在本机平台以外,需要设置CGO_ENABLED,并且指定CC. linux和macos还好,windows也是需要gcc工具链,这个就需要部署MinGW等很复杂的操作。
在多次尝试后,受到这个项目的启发,编写了一个更简单的xcgo docker image.
之前曾介绍过一款用Node.JS实现的开源RTMP流媒体服务端。目前更新到2.1.3版本,这是个从15年出开始接触Node.js作为研习而建立的项目。说起写完这个项目,对理解nodejs异步架构,rtmp网络协议还是起到了非常重要的作用。
rtmp协议如果用异步解析数据还是比较麻烦的,最早的版本写了个buffer缓冲,再用Generators/yield来转成同步逻辑,简单了许多。接触到async、await后又更新了个版本,代码可读性提高了不少。最后又学习了一个异步状态机的实现,比较满意。
今天接到一个客户的需求,在不改变原有fms服务架构的条件下,对接到Node-Media-Server,提供HLS,RTMP,Http-FLV音频转码服务。
客户以往的架构是Flash在web推流,h.264+Nellymoser编码格式,这个用flash播放是没有问题的
但flash基本上已经被各大浏览器列为默认关闭了,Android,iOS等更是不会支持的。
现在的解决方案,基本上是往HLS,http-flv上靠。HLS提供了最好的兼容性,http-flv提供了最低的延迟性,各有优劣吧。
关键的问题在于,Nellymoser编码并非互联网上广泛支持的格式,就算服务端支持,客户端也基本(有h5客户端支持,后话)上无法实现。
因此,还需要使用ffmpeg进行音频转码。
架构如下:
fms端使用服务端编程,监听 onPublish 和 onUnpublish事件,将参数通过http传参调用。
nms增加api接口收到开始和结束的事件,调起ffmpeg从fms拉流,copy视频,aac编码音频后推到Node-Media-Server。
Node-Media-Server则提供出hls,rtmp,http-flv流。
注:NodePlayer.js 支持web浏览器解码播放Nellymoser,并且兼容各大pc,安卓,iPhone。
需要了解方案详情欢迎与我联系
In other news, GStreamer is now almost buzzword-compliant! The next blog post on our list: blockchains and smart contracts in GStreamer.
Late last year, we at Centricular announced a new implementation of WebRTC in GStreamer. Today we’re happy to announce that after community review, that work has been merged into GStreamer itself! The plugin is called webrtcbin, and the library is, naturally, called gstwebrtc.
The implementation has all the basic features, is transparently compatible with other WebRTC stacks (particularly in browsers), and has been well-tested with both Firefox and Chrome.
Some of the more advanced features such as FEC are already a work in progress, and others will be too—if you want them to be! Hop onto IRC on #gstreamer @ Freenode.net or join the mailing list.
Currently, the easiest way to use webrtcbin is to build GStreamer using either gst-uninstalled(Linux and macOS) or Cerbero (Windows, iOS, Android). If you’re a patient person, you can follow @gstreamer and wait for GStreamer 1.14 to be released which will include Windows, macOS, iOS, and Android binaries.
The API currently lacks documentation, so the best way to learn it is to dive into the source-tree examples. Help on this will be most appreciated! To see how to use GStreamer to do WebRTC with a browser, checkout the bidirectional audio-video demos that I wrote.
前期曾发布过一款windows平台RTMP推送摄像头画面的浏览器插件,近期对这款产品进行了升级,现已支持捕获桌面画面进行推流。
桌面推流当然首选OBS,专业性毋庸置疑。本人开发的这款产品定位为简单业务需求,只需引导客户安装5M左右大小的插件程序,无需任何配置,即可在web网页中进行摄像头或桌面画面的捕获推流。
在本次更新中,加入了H.265编码器的支持,视频码率更低。同时,在SSE指令集加速的软编码基础上,增加了AMD/NVIDIA/INTEL独显核显硬件加速编码,CPU消耗更低。
本插件同时也加入了直播播放器的支持,可以播放rtmp,rtsp,http协议的直播流,并支持硬件加速解码,首屏秒开与延迟消除技术。 继续阅读“Windows平台浏览器内捕获桌面画面并RTMP推流”
- 小程序不会对写入数据包大小做限制,但系统与蓝牙设备会限制蓝牙4.0单次传输的数据大小,超过最大字节数后会发生写入错误,建议每次写入不超过20字节。
可能你已经在用小程序开发BLE应用了,也遇上了这个问题,我这儿是一种写法,并不限于这一种,仅供参考
|
1 2 3 4 5 6 7 8 9 10 11 12 13 14 15 16 17 18 19 20 21 |
let buffer = BLEControl.addPassUser(1,1,0,"123456"); let pos = 0; let bytes = buffer.byteLength; while(bytes > 0) { let tmpBuffer; if(bytes > 20) { tmpBuffer = buffer.slice(pos, pos + 20); pos += 20; bytes -= 20; } else { tmpBuffer = buffer.slice(pos, pos + bytes); pos += bytes; bytes -= bytes; } wx.writeBLECharacteristicValue({ deviceId: this._deviceId, serviceId: this._serviceId, characteristicId: this._characteristicId, value: tmpBuffer, }) } |